
Assembly Instructions
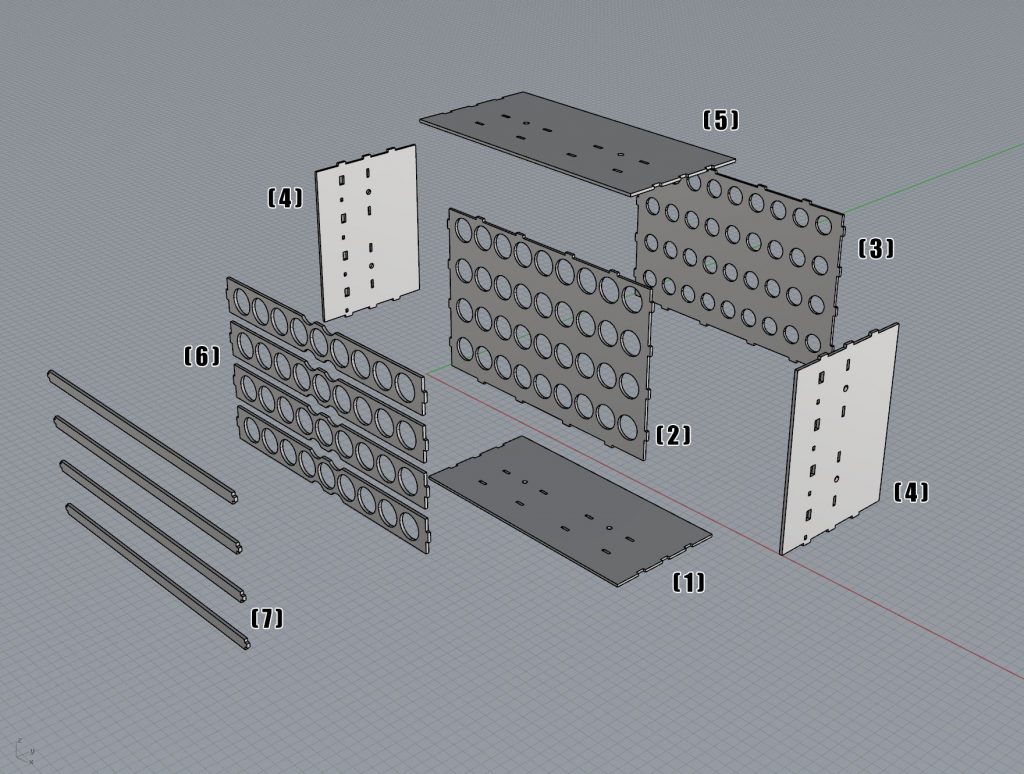
- Lay bottom piece (1) flat on your working surface, as shown in the diagram above with the tabs that do NOT have the round magnet holes in the front.
- Apply wood glue to all the tabs on piece (2) as well as on the outer edges where it will join the outer walls.
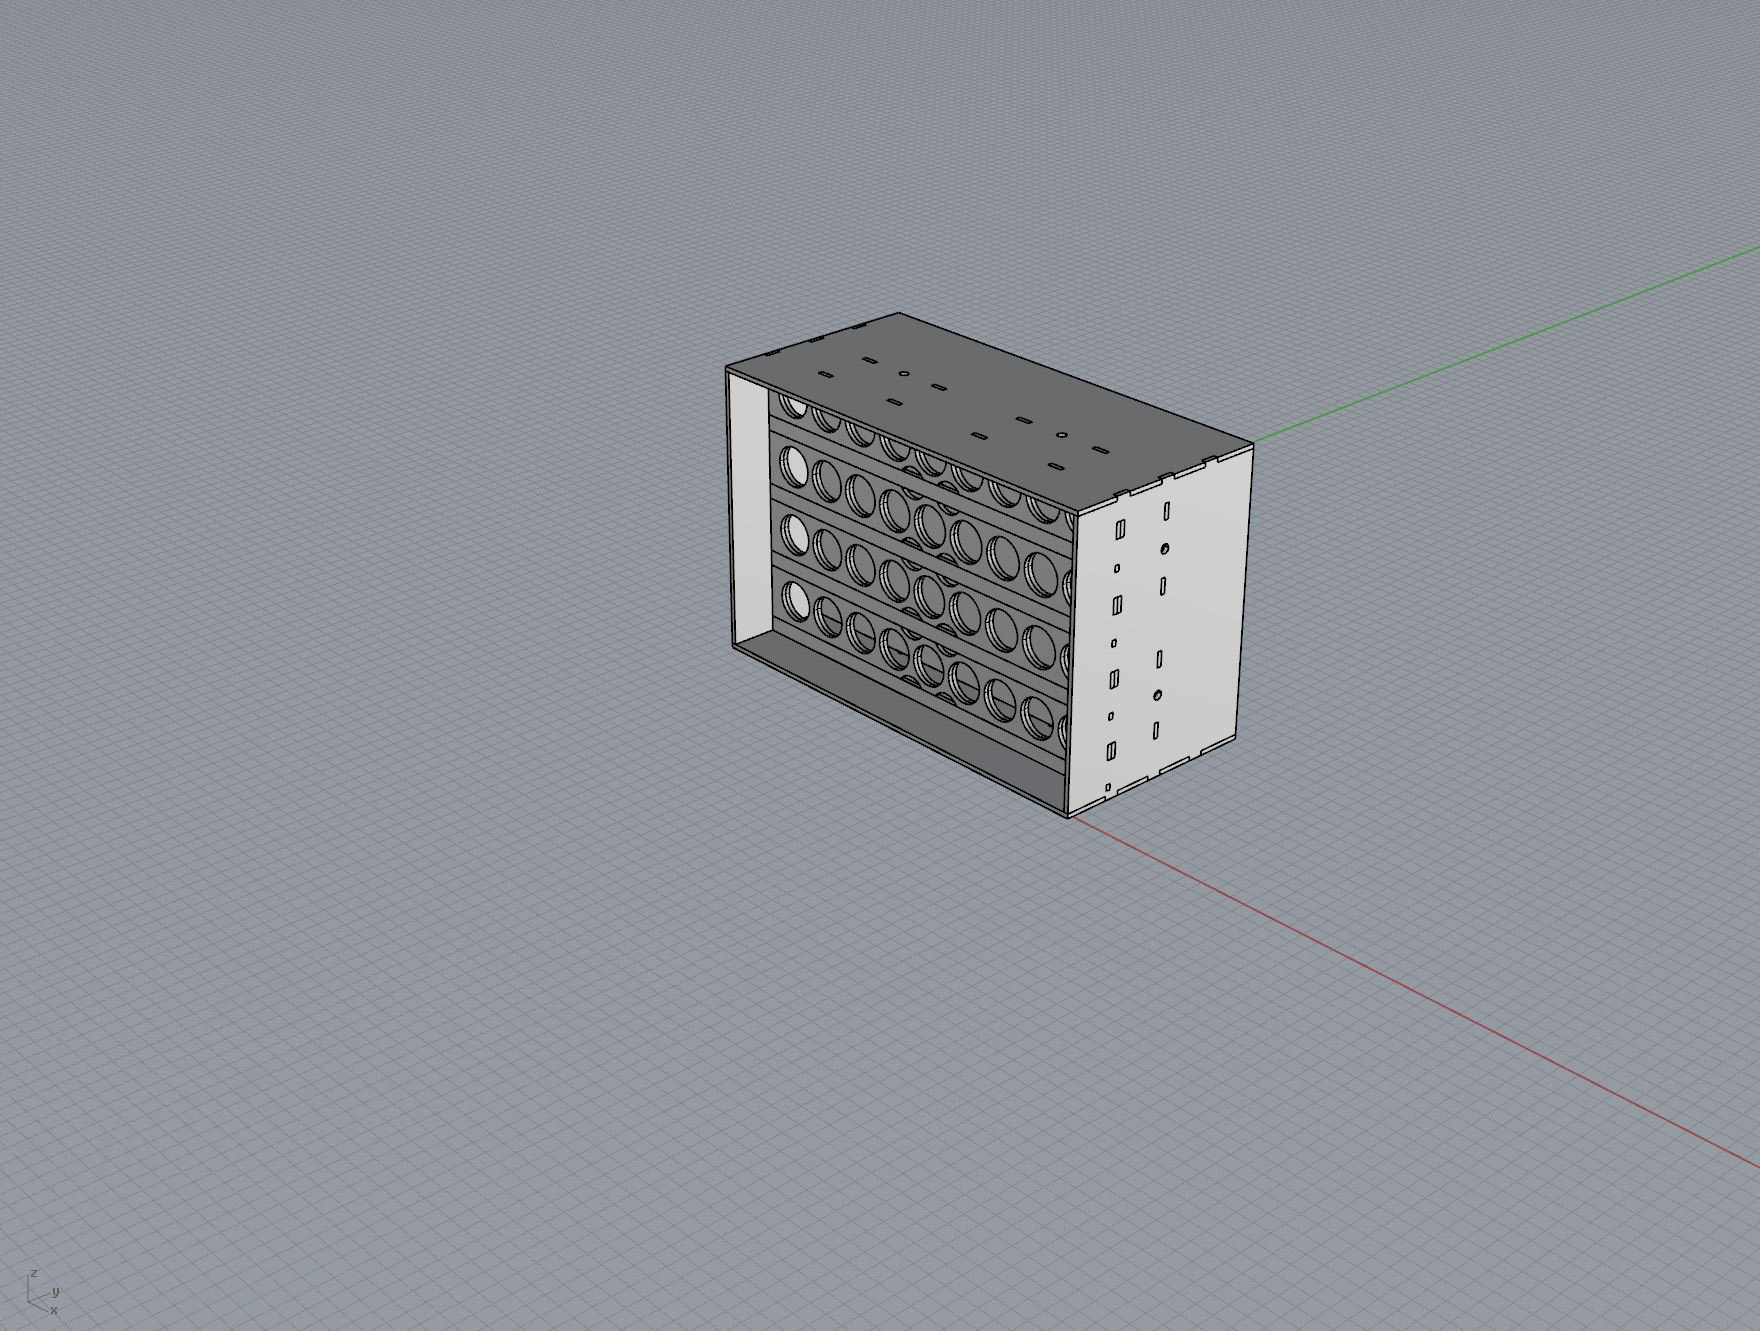
- Insert the bottom tabs of piece (2) into the front tabs of piece (1), ensuring that the bottom of piece (2) is correctly oriented. (The bottom of piece (2) has a bit more space between the circles and the bottom edge than the top does. See pic above.)
- Apply wood glue to all the tabs on piece (3) as well as on the outer edges where it will join the outer walls.
- Insert the bottom tabs of piece (3) into the back tabs of piece (1), ensuring that the bottom of piece (3) is correctly oriented. (The bottom of piece (3) has a bit more space between the circles and the bottom edge than the top does. See pic above.)
- Apply wood glue to all the tabs of the side walls (4) as well as the bottom and top edges where they will meet the bottom (1) and top (5) pieces.
- Insert the side pieces, carefully aligning the bottom tabs with the bottom piece (1) as well as the side tabs of pieces (2) and (3).
- Insert the to piece (5) from above, aligning all the tabs to ensure they fit correctly.
- Place a 1″-2″ strip of masking tape on each of the corner edges of the paint rack, to help align everything so that there’s no gaps while the glue dries.
- Apply some wood glue to one side of each long, rectangular piece (6) and carefully insert one side of the piece into the tab hole present in the side wall pieces (4). Then carefully bend the rectangular piece slightly, in the middle allowing you to insert the other side tab into the other side piece (4). Be careful not to bend/bow the piece too much or you may break it in the middle. Once the long rectangular piece (6) is inserted into the tabs on each side, reach into the circular holes with your fingers and squeeze the rectangular piece (6) to the main piece (2) to ensure the pieces get glued flush together and so that you squeeze out any excess glue and wipe it off.
- Repeat step 10 for each of the long rectangular pieces (6).
- Let the glued paint rack parts dry.
- Cut out the paper backers for the label pieces that will fit behind the acrylic pieces (7) and slide them into the gaps formed between the long rectangular pieces (6).
- Remove protective backing from the acrylic pieces (7).
- Insert one side of an acrylic piece (7) into the small tab that is cut out of the side pieces (4). Then, carefully bend the acrylic piece slightly in the middle to allow you to insert the other side of it into the other tab on the other side. Let go of the slight bend in the middle of the acrylic piece and it should snap into place flush. If you have any challenge getting the acrylic piece to fit into the side wall tab holes, check to ensure no wood glue has blocked any part of the tab hole. Repeat for all the acrylic pieces.
- The acrylic pieces can be removed by carefully grabbing them in the middle with your fingers, and pulling one side of the acrylic piece out of the tab hole in each side, and the paper label backer can be replaced at any time.
* If your paint rack came with additional MDF pieces that look exactly like the acrylic pieces (7), those are just extras that can be used instead of the acrylic pieces if you wish, but outside of that they are not needed.
Printable Label Sheet
Here is a printable blank label sheet that you can use with your paint rack.